This chapter mainly introduces how to use Windows Subsystem for Linux to run a Linux environment under Windows.
Introduction1
Most schools' competition practice environments are built on the Windows operating system, but the NOI series competitions now use NOI Linux, a modified version of the Ubuntu operating system.
The environment requirements for NOI competitions (as of September 1, 2021) are as follows.2
| Category | Software or Module | Version | Notes |
|---|---|---|---|
| System | Linux kernel | 5.4.0-42-generic | 64-bit x86 (AMD64) |
| Language environment | GCC (gcc and g++) | 9.3.0 | C and C++ compilers |
| FPC | 3.0.4 | Pascal compiler (note: the NOI series competitions have not supported the Pascal language since 2022) | |
| Python 2 | 2.7 | Non-competition language | |
| Python 3 | 3.8 | Non-competition language | |
| Debugging tools | GDB | 9.1 | |
| DDD | 3.3.12 | GUI front end for GDB | |
| Integrated development environment (IDE) | Code::Blocks | 20.03 | C/C++ IDE |
| Lazarus | 2.0.6 | Pascal IDE | |
| Geany | 1.36 | C/C++/Pascal (lightweight) IDE | |
| Text editors | Visual Studio Code | 1.54.3 | |
| GNU Emacs | 26.3 | ||
| gedit | 3.36.2 | ||
| Vim | 8.1 | ||
| Joe | 4.6 | ||
| nano | 4.8 | ||
| Sublime Text | 3.2.2 | ||
| Other software | Firefox | 79.0 | Browser |
Midnight Commander (mc) | 4.8.24 | File manager | |
| xterm (uxterm) | 3.5.3 | Terminal | |
| Arbiter-local | 1.02 | Standalone program evaluation tool |
The examination environment differs from the usual environment in several ways:
- Operations on the command line differ from operations in the graphical interface.
- Linux and Windows differ, for example in case sensitivity.
- The behavior of different compilers (MSVC and GCC) and different compiler versions (GCC on Windows and Linux, 32-bit and 64-bit Linux GCC, GCC 7 and GCC 8, etc.) differs, for example in how variables are initialized and how out-of-bounds array indices are handled.
- Different evaluation systems (Luogu and Arbiter) differ in their timeout checks and memory limit checks.
This may lead to a series of awkward situations:
- Trying to copy with Ctrl+C instead exits the program.
- A program template that normally gets AC gets WA on Linux.
To prevent such awkward situations from occurring at the competition venue, we must familiarize ourselves with operating a Linux system in advance.
Although the NOI official website has released an ISO image of NOI Linux, configuring a virtual machine is relatively troublesome. Moreover, since NOI Linux comes with a graphical interface by default, smooth operation on low-end systems cannot be guaranteed.
Windows 10 introduced the Linux subsystem in its Anniversary Update, and it was upgraded to WSL 2 in the May 2020 update. As of June 1, 2020, WSL supported installing mainstream Linux distributions such as Ubuntu, openSUSE Leap, Kali, and Debian. However, WSL does not support Arbiter, which is used for NOI evaluation.
What Is the Linux Subsystem (WSL)
Windows Subsystem for Linux (WSL) is a compatibility layer that allows Linux binary executables (in ELF format) to run natively on Windows 10, Windows 11, and Windows Server 2019.
WSL allows developers to run a GNU/Linux environment as is—including most command-line tools, utilities, and applications—without the overhead of a virtual machine.
WSL is available only on 64-bit Windows 10 version 1607 and later, Windows 11, and Windows Server 2019/2022.
Enable WSL3
Automatic Installation
Warning
This section applies to Windows 10 version 2004 and later (build 19041 and later) or Windows 11.
If you are using a version below 2004 or your computer does not support virtualization, read the manual installation section below.
If you are using a version of Windows 10 below 1607, your system does not support WSL.
-
Open Windows PowerShell as an administrator (right-click the “Start” button and choose Windows PowerShell (Administrator) or Windows Terminal (Administrator))
-
Enter
wsl --installand wait for all components to be installed automatically. During this process, you may need to restart your computer to enable the necessary Windows features. -
After installation is complete, you can find the distribution you installed in the “Start” menu or in a tab of Windows Terminal.
-
Next, go to the “Configure the Distribution” section below to complete the other settings.
Manual Installation4
Warning
The steps for manually installing WSL are described below. If you have already completed the automatic installation, skip this section.
Enable Windows Subsystem for Linux
Before installing any Linux distribution for WSL, you must choose one of the following two methods to ensure that the optional “Windows Subsystem for Linux” feature is enabled:
Using the command line:
-
Open PowerShell as an administrator and run:
Enable-WindowsOptionalFeature -Online -FeatureName Microsoft-Windows-Subsystem-Linux # If you only want to use WSL 1, skip this step Enable-WindowsOptionalFeature -Online -FeatureName VirtualMachinePlatform -
Restart the computer when prompted.
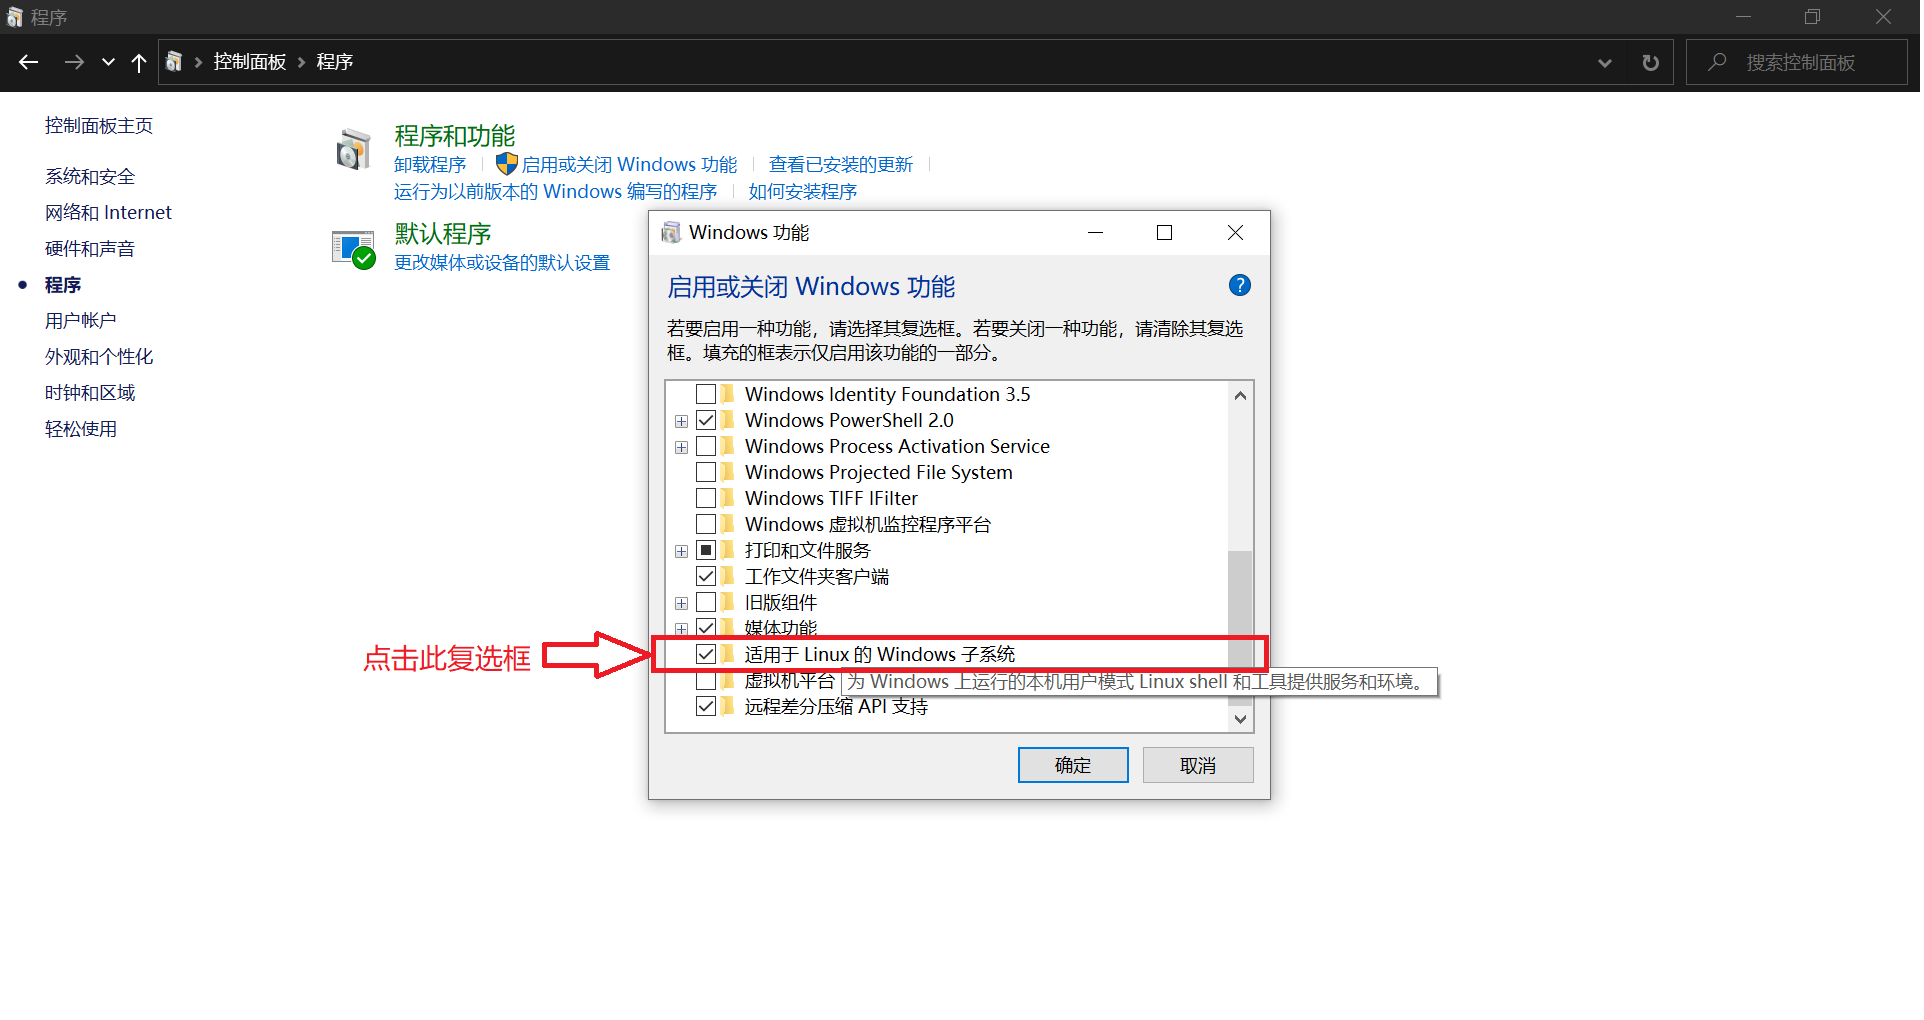
Using the graphical interface:
-
Open “Control Panel”
-
Go to the “Turn Windows features on or off” submenu under “Programs and Features”
-
Select “Windows Subsystem for Linux” and “Virtual Machine Platform”
-
Click OK
-
Restart
Install the Kernel Update Package
If you want to use WSL 1, skip this step.
Download and install the WSL2 Linux kernel update package for x64 machines.
Set the Default WSL Version
In most cases, using WSL 2 is recommended. For the difference between WSL 1 and WSL 2, see Compare WSL 2 and WSL 1.
About systemd
WSL 1 does not support systemd at all (which means that some functions requiring systemd cannot be implemented or require other alternatives). WSL 2 has built-in support for systemd. If you need to use systemd but the distribution currently running is not configured to enable systemd, refer to Advanced settings configuration in WSL.
# Set the default WSL version to WSL 2
wsl --set-default-version 2
Install a WSL Distribution
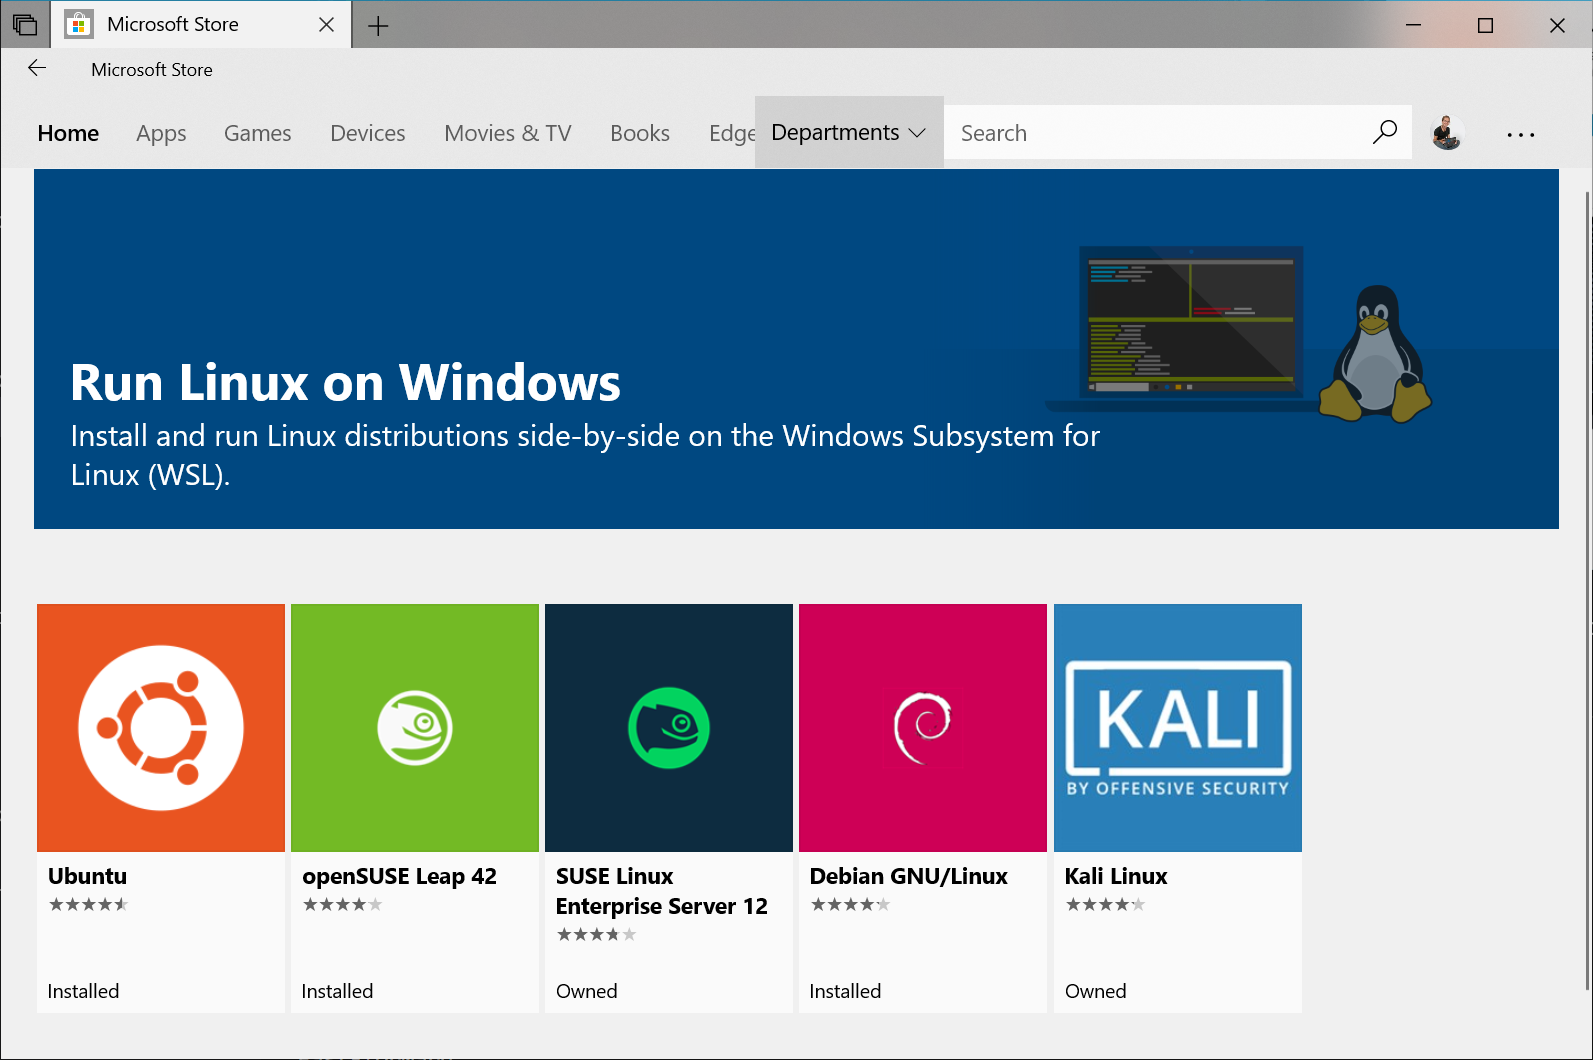
Go to the Microsoft Store, search for “Ubuntu,” select “Ubuntu,” and click “Install” to install it. You can also open Ubuntu's Store page.
Warning
The Ubuntu in the Microsoft Store is updated along with Ubuntu, so its contents may change. If you want a stable Ubuntu long-term support version, you can install an Ubuntu LTS version from the Microsoft Store.
Configure the Distribution5
This chapter uses the Ubuntu automatically installed by Windows as an example.
Run Ubuntu
Open the “Start” menu, find Ubuntu, and launch it, or use the wsl command to launch it from the Windows command line.
You can create an application tile for Ubuntu or pin it to the taskbar so that it is convenient to open next time.
Initialization
The first time you run Ubuntu, you need to complete initialization.
Installing, this may take a few minutes...
Wait for a minute or two, and the system will prompt you to create a new user account.
    Please create a default UNIX user account. The username does not need to match your Windows username.
    For more information visit: https://aka.ms/wslusers
    Enter new UNIX username: chtholly
After entering the username, you will be prompted to enter a password. In Linux, it is normal for no text to be displayed on the screen while entering a password.
Enter new UNIX password:
After setting the account name and password, WSL is installed.
    Installation successful!
    To run a command as administrator (user "root"), use "sudo <command>".
    See "man sudo_root" for details.

    chtholly@SENIORIOUS:~$
Basic Configuration
The newly installed system does not include any C/C++ compiler, so the environment must be configured manually.
$ gcc
The program 'gcc' is currently not installed. You can install it by typing:
sudo apt install gcc
$ g++
The program 'g++' is currently not installed. You can install it by typing:
sudo apt install g++
Change to a Domestic Software Source
Ubuntu's default software sources are located abroad. You can switch to a domestic software source to increase the speed, such as Tsinghua TUNA's software source.
Use a Software Source Matching Your System Version
Find the source matching your system version on the page (you can use sudo lsb_release -a to view the Ubuntu version).
Unless you know what you are doing, do not use a source that does not match your system version!
Use the following commands to update the software and software sources:
$ sudo su # After executing this command, the terminal prompt changes from $ to #; pay attention to the prompt before executing the commands below
[sudo] password for xxx:
# cp /etc/apt/sources.list /etc/apt/sources.list.bak
# vim /etc/apt/sources.list
...(after pressing i, right-click to paste the source above, press Esc when finished editing, then enter :wq and press Enter)
# apt update
# apt upgrade -y
# exit
exit
$
Install a Chinese Environment
# apt install language-pack-zh-hans -y
# apt install fontconfig -y
# apt install fonts-noto-cjk fonts-wqy-microhei fonts-wqy-zenhei -y # Chinese fonts
# dpkg-reconfigure locales
At this point, a settings menu will appear; do not worry about it and simply press Enter.
In the next menu, select zh_CN.UTF-8 and press Enter.
    Default locale for the system environment:

                 None
                 C.UTF-8
                 en_US.UTF-8
                [zh_CN.UTF-8]

            <Ok>            <Cancel>
Afterward, shut down WSL and restart it; the system will become Chinese.
Then enter the following commands in order to replace the man manual pages with Chinese ones.6
# apt install manpages-zh
# sed -i 's|/usr/share/man|/usr/share/man/zh_CN|g' /etc/manpath.config
You can use man help to test it.
Install the Compilation Environment7
# apt install -y build-essential vim ddd gdb fpc emacs gedit anjuta lazarus
For installation of GUIDE, see Installing GUIDE on Debian or Ubuntu.
This installs the basic environment plus the environment officially required by NOI. If necessary, you can use sudo apt install <程序名> to install other software packages.
To install other versions, refer to the Debian official package management manual.
Here is an example program:
$ vim cpuid.cpp
...
$ g++ -Wall cpuid.cpp -o cpuid
$ ./cpuid
AMD Ryzen 5 1400 Quad-Core Processor
Note
Executable files in a Linux environment do not need an extension; see the command above for how to run them.
Advanced Operations
Run GUI Programs with WSLg
If you use Windows 10 version 19044 or later or Windows 11, you can use the integrated desktop experience provided by WSL 2. This feature allows you to install and launch Linux desktop programs directly without any other configuration.
See Run Linux GUI apps on Windows Subsystem for Linux.
Install a Graphical Environment and Connect Using Remote Desktop
If your version does not yet support WSLg, you can try using the following guide to enable graphical interface functionality.
The following uses Xfce as an example.
If you only want to install Xfce, run:
$ sudo apt install xfce4 tightvncserver -y
If you want more software in addition to Xfce, run:
$ sudo apt install xubuntu-desktop -y
The graphical environment files are large, and downloading and unpacking them takes some time.
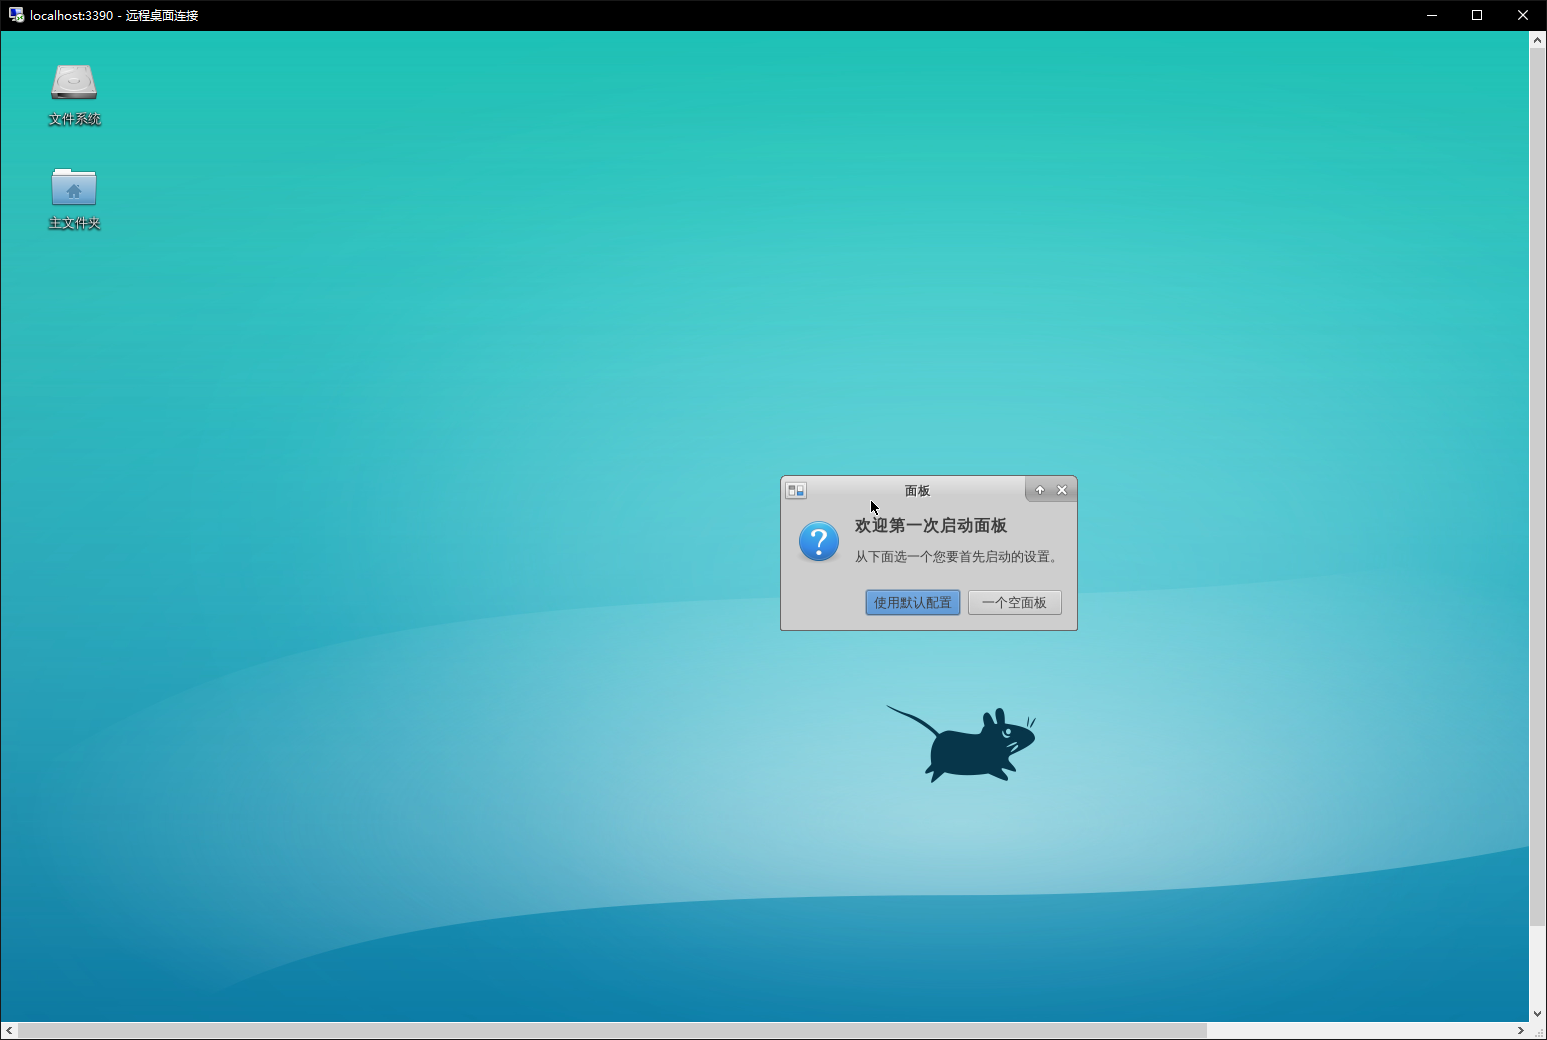
Configure xrdp:
$ sudo apt install xrdp -y
$ echo "xfce4-session" >~/.xsession
$ sudo service xrdp restart
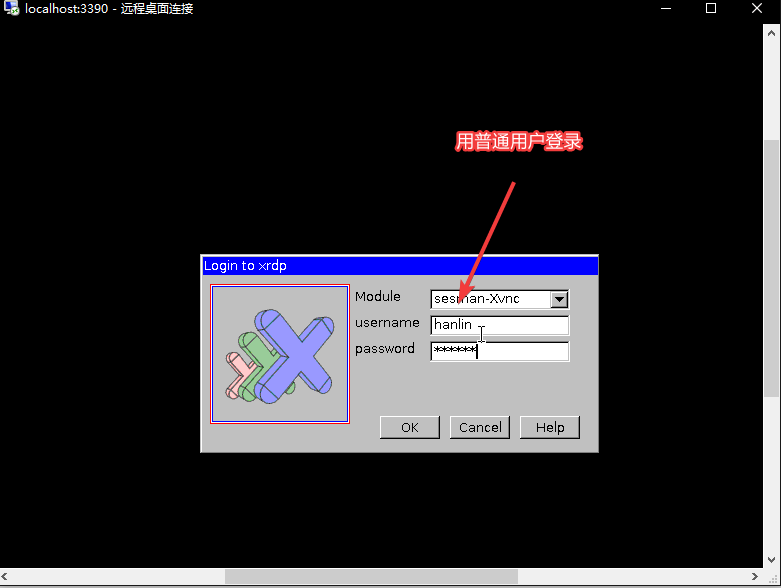
To prevent conflicts with the computer's existing remote desktop, the default port needs to be changed.
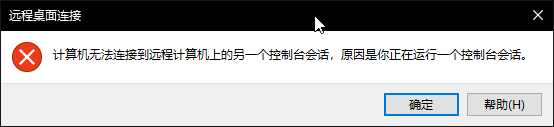
Run the command sudo sed -i 's/port=[0-9]\{1,5\}/port=otherport/' /etc/xrdp/xrdp.ini, where otherport is another port (such as 3390).
[globals]
...
port=3390
Run sudo service xrdp restart, then go to the Start menu and use localhost:otherport to access it.
Connect Using Xming
Enter the Ubuntu environment and install xterm:
# apt install xterm -y
Exit Ubuntu.
Download the latest Xming Server from the Xming X Server download page and install it:
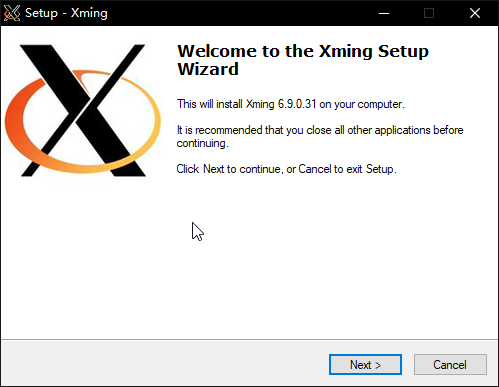
If you forgot to check Launch Xming after installation, open Xming from the Start menu:
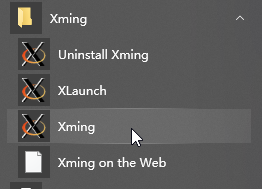
Then return to Ubuntu and enter the following command:
$ DISPLAY=:0 xterm
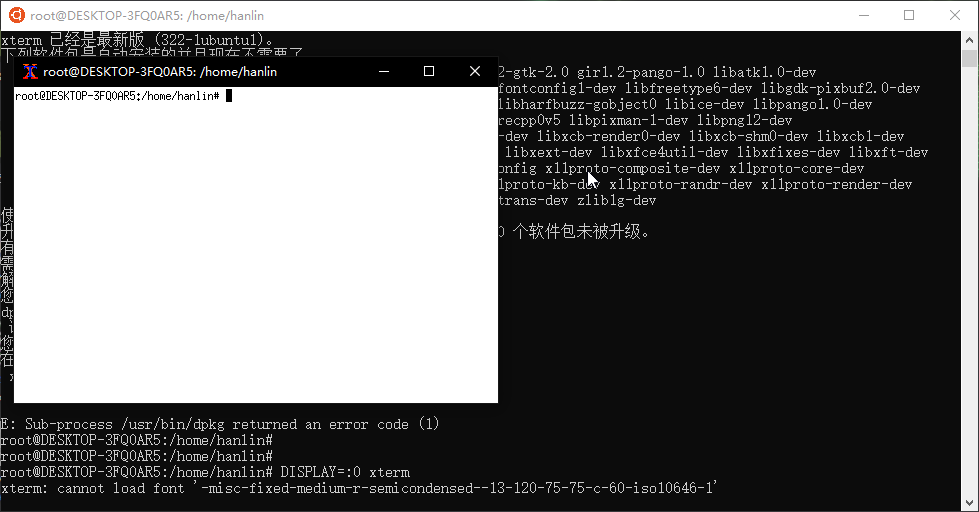
If you used xfce4, you can activate xfce4 in the window that appears with the following command:
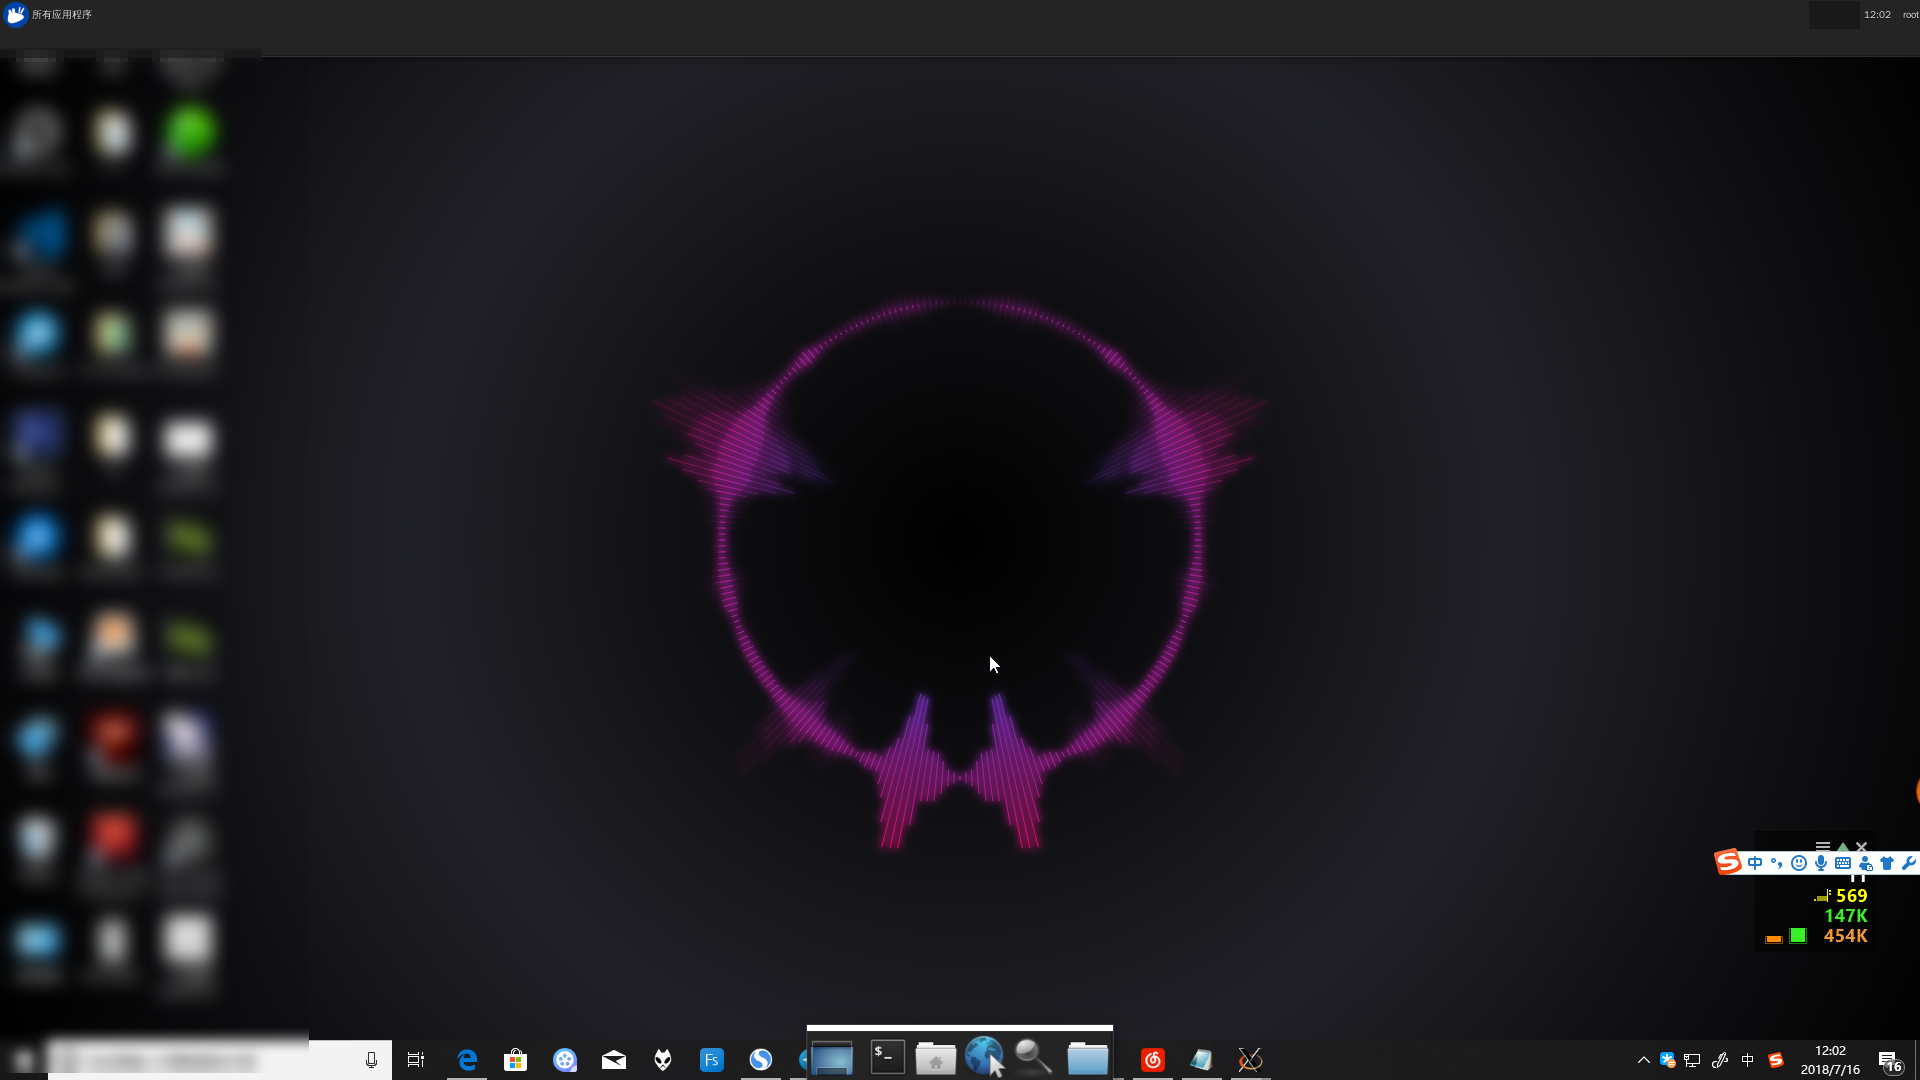
$ xfce4-session
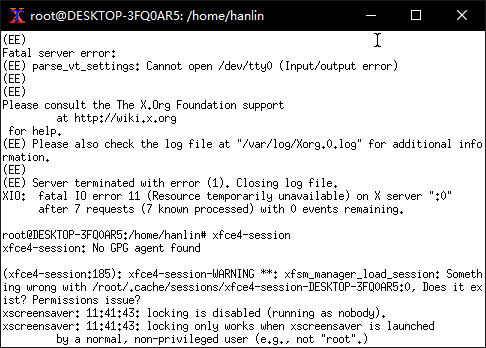
The result is shown in the figure. (In Xming, you can exit this interface with Ctrl+C.)
Access Windows Files from WSL and Vice Versa
Hard drives under Windows are automatically mounted in the Linux environment under the /mnt folder.
For example, the path of the C drive under WSL is /mnt/c.
PS C:\Users\chtholly> bash
/mnt/c/Users/chtholly$ echo "Hello world!" > hello
/mnt/c/Users/chtholly$ exit
PS C:\Users\chtholly> cat hello
Hello world!
PS C:\Users\chtholly> echo "Welcome!" > welcome
PS C:\Users\chtholly> bash
/mnt/c/Users/chtholly$ cat welcome
Welcome!
You can also access WSL directories from the file manager. After installing WSL, you can find a Linux item in the sidebar of File Explorer, where you can access files in all installed distributions.
Likewise, you can enter \\wsl$ directly in the File Explorer path bar or Run (Win+R) to go to the WSL directory.
You can also directly use a path such as \\wsl$\Ubuntu\home\ to access its subfolders.
Edit with Visual Studio Code
If you are accustomed to editing code in the Windows environment with Visual Studio Code, you can install the Remote - WSL extension in VS Code to edit files in the WSL system more conveniently.
With Remote - WSL, you can operate the WSL subsystem directly in the VS Code interface under Windows, making it more convenient to edit files in the subsystem directory and use the terminal for debugging.
By entering code . directly in WSL, you can call up Visual Studio Code directly in that directory and edit its files.
At the same time, you can use a command such as code filename to edit a specified file.
The Getting Started page of the Remote - WSL extension contains a detailed introduction to editing operations.
You can also refer to the content about WSL in Visual Studio Code's official documentation (Remote development in WSL), which contains a more detailed introduction to the entire process from installing WSL to using it with the extension.
Upgrade WSL1 to WSL2
Warning
Make sure you have completed the WSL1 installation steps above.
Running wsl -l -v shows that the WSL version is 1; you need to upgrade it to reach 2.
-
Enable the “Virtual Machine Platform” feature
Run PowerShell as an administrator:
dism.exe /online /enable-feature /featurename:VirtualMachinePlatform /all /norestartThen restart the computer.
-
Download the Linux kernel update package
- The x64 kernel update package.
- The ARM64/AArch64 kernel update package.
-
Set the distribution version
Run the command:
wsl --set-version <分发版名称> <版本号>For example, the command to set Ubuntu 18.04 to WSL 2 is
wsl --set-version Ubuntu-18.04 2.This step takes some time. After it is complete, use the command
wsl -l -vto check whether the upgrade succeeded.
FAQ
-
How do I do xxx in the subsystem?
You can use the built-in command line or the graphical interface. For example, for vim, type
man vimon the command line for detailed instructions. You can also usevim --help.For the command line, see Command Line.
-
How much system resource does it use?
This system shares a Host with Windows 10, so theoretically it uses fewer resources than a virtual machine.
External Links
- About Windows Subsystem for Linux
- Ubuntu Mirror Usage Help, Tsinghua TUNA
- Dev on Windows with WSL (Elegant Development on Windows with WSL)
- Awesome-WSL on GitHub
- Troubleshoot Windows Subsystem for Linux
- Upgrade WSL1 to WSL2