Introduction
Visual Studio Code (hereinafter VS Code) is an open-source code editor developed by Microsoft that supports operating systems including Windows, Linux, and macOS. It is written in TypeScript and uses the Electron architecture. It has built-in support for JavaScript, TypeScript, and Node.js, and provides a rich extension ecosystem for other languages such as C, C++, Java, Python, PHP, and Go.
Official website: Visual Studio Code - The open source AI code editor
Before reading the following content, it is recommended that you first learn the basic use of VS Code: Get started.
Running Code with the C/C++ Compile Run Extension
C/C++ Compile Run is an extension focused on compiling and running single C/C++ files. It eliminates the cumbersome configuration steps of traditional C/C++ extensions, making it particularly suitable for programming contests; it is quick to get started with and simple to use.
Open VS Code, click the “Extensions” icon in the left sidebar (or press Ctrl+Shift+X), enter C++ in the search box, find C/C++ Compile Run, and click “Install”.
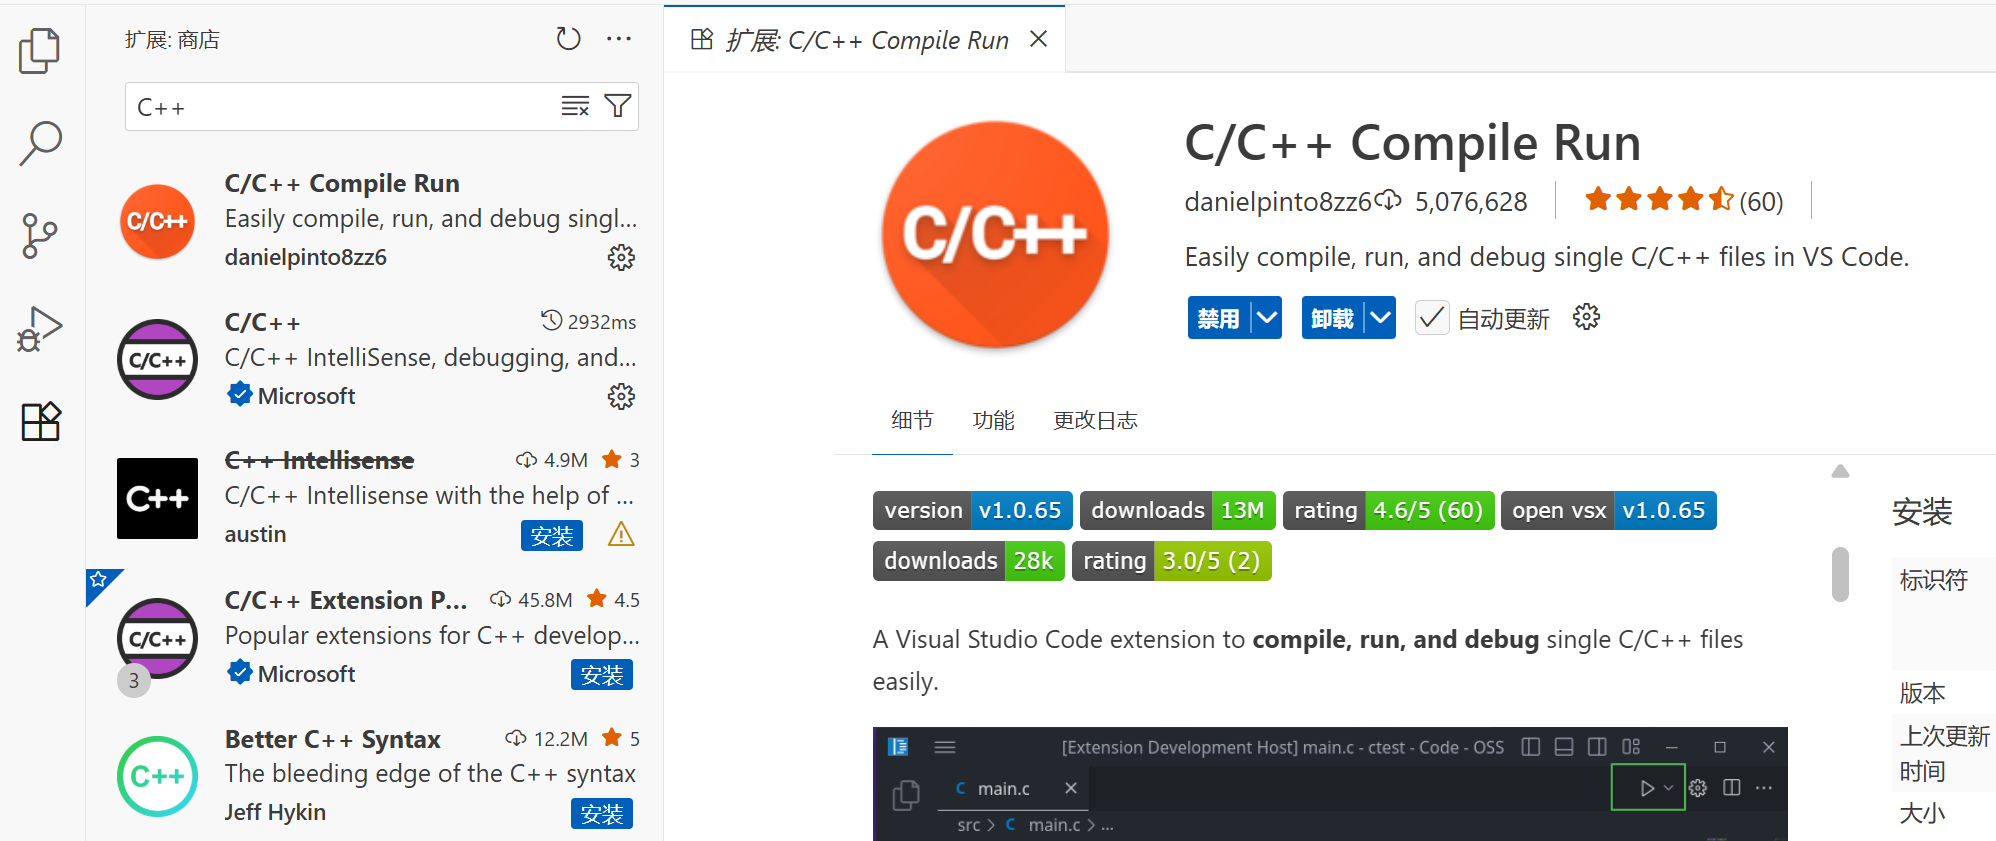
After installation, no additional configuration is needed. The extension automatically adapts to the configured MinGW compiler according to the environment variables.
Open the file to run and click the triangle icon in the upper-right corner to run the code.
Shortcuts:
- F6- Compile and run in the integrated terminal built into VS Code
- F7- Compile with custom parameters and run in the integrated terminal built into VS Code with custom parameters
- F8- Compile and run in an external terminal
Running Code with the Code Runner Extension
VS Code can support C/C++ after installing and configuring an extension, but the configuration process is relatively complicated. A simple way to compile and run C++ programs is to install the Code Runner extension.
Code Runner is an extension that can run code with one click. In engineering, it is generally used to verify code snippets. It supports more than 40 languages, including Node.js, Python, C, C++, Java, PHP, Perl, Ruby, and Go.
To install it, search for Code Runner in the Extensions Marketplace and click Install; or go to the Marketplace and click Install. The browser will automatically open VS Code and install it.
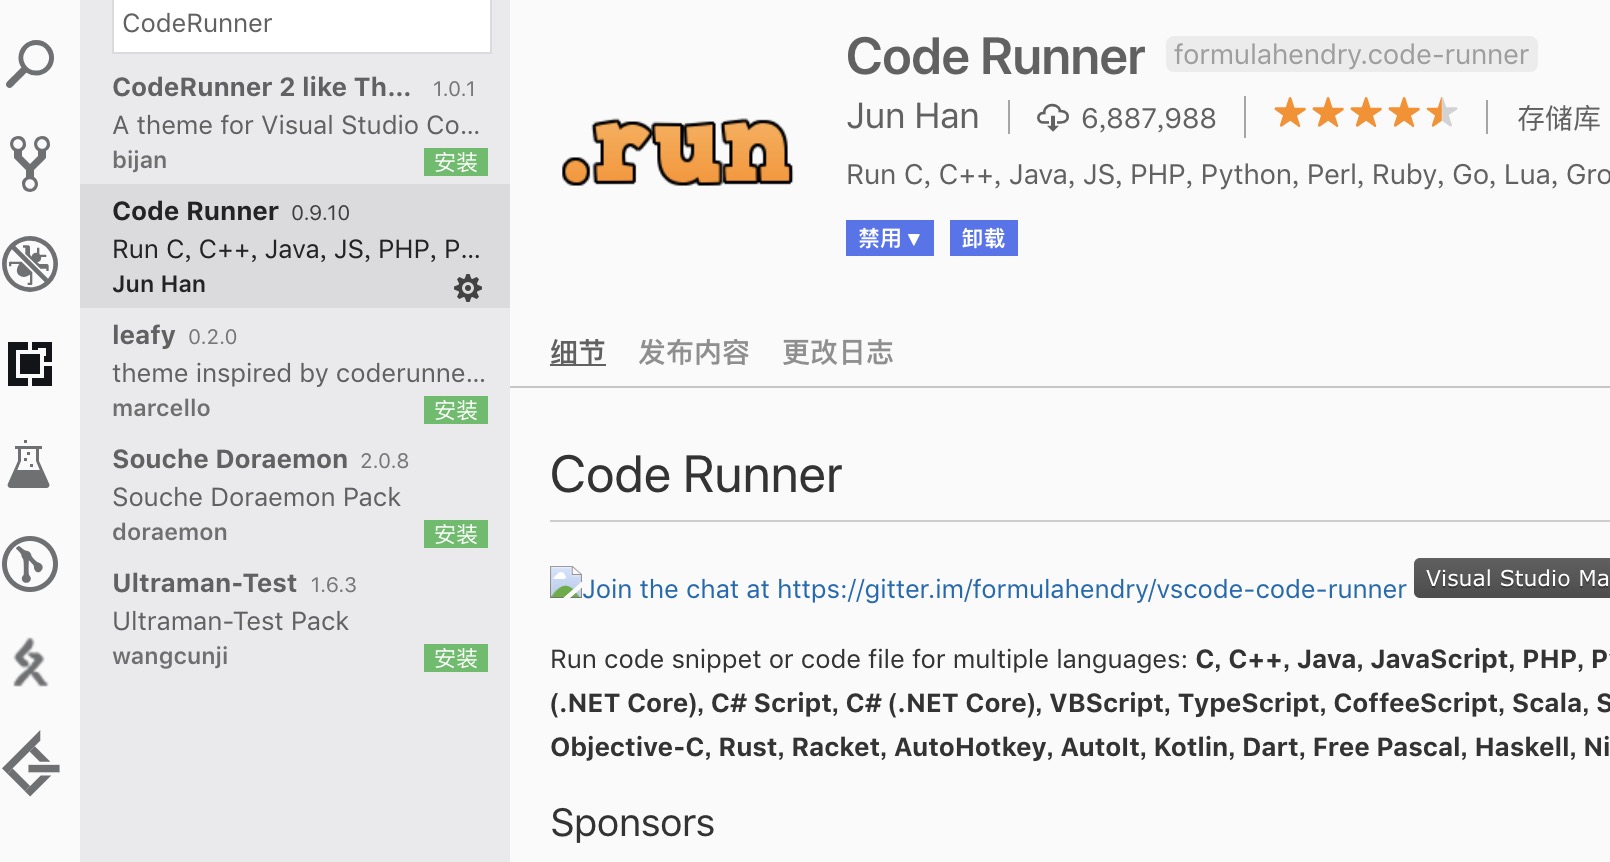
After installation, open the file to run and click the small triangle icon in the upper-right corner to run the code. Pressing Ctrl+Alt+N (Control+Option+N on macOS) has the same effect.
Warning
If the code still cannot run after VS Code and Code Runner have been installed, it is very likely that the C/C++ runtime environment has not yet been installed. Refer to the Hello, World! page to install it.

Compiling, Debugging, and Providing IntelliSense with the C/C++ Extension
Installing the Extension
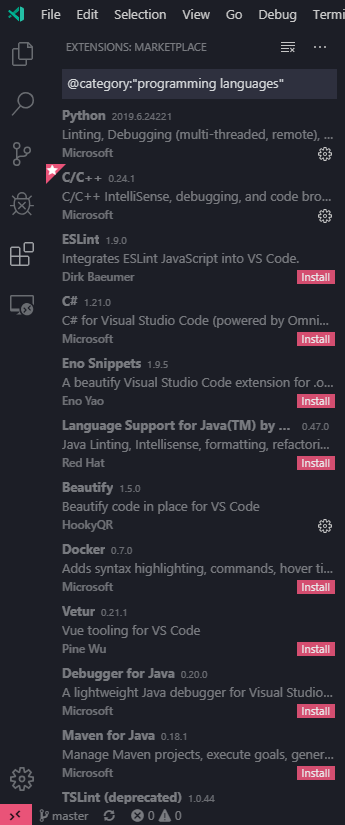
Open the Extensions Marketplace in VS Code, enter C++ or @category:"programming languages" in the search bar, find C/C++, and click Install to install the extension.
Warning
Before configuring, make sure that G++ or Clang is installed on the system and has been added to the PATH environment variable. Use CMD or PowerShell, rather than Git Bash, as the integrated terminal.
Configuring the GDB/LLDB Debugger
GDB
Create a new C++ code file in VS Code, write some content according to C++ syntax (such as int main(){}), save it, and press F5 to enter debugging mode.
If a “Select debugger” prompt appears, select C++ (GDB/LLDB). In “Select configuration”, G++ users should select g++.exe - 生成和调试活动文件; Clang users should select clang++ - 生成和调试活动文件.
Warning
Configuration names are not fixed and can be customized. Different operating systems may have different configuration names.
After completion, VS Code will automatically complete the initialization and start debugging in the integrated terminal below. At this point, the entire GDB configuration process is complete.
LLDB
If you need to use LLDB, you need to install another extension1—CodeLLDB. Download the .vsix file from the project's Release page2, then install it from VS Code's Extensions page.
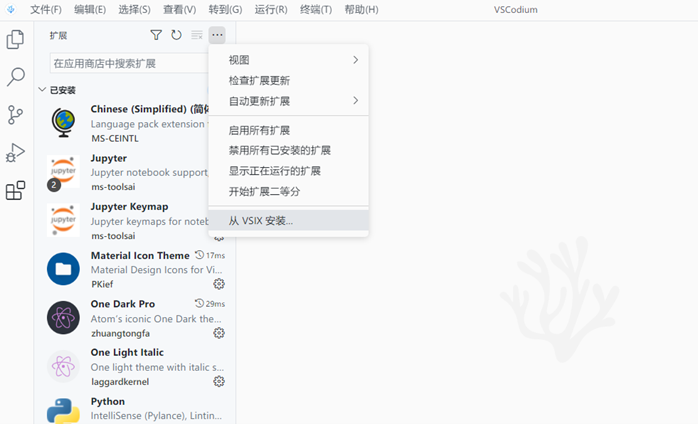
First follow the GDB configuration procedure above, then delete .vscode/launch.json, press F5, select LLDB, and change ${workspaceFolder}/<executable file> in launch.json to ${fileDirname}/${fileBasenameNoExtension}.
At this point, LLDB configuration is complete. Press F5 again to see the debugging information at the bottom of the software.
If you want to compile and debug code with VS Code later, all source code must be saved in this folder. To compile and debug code stored in another folder, repeat the above steps (or copy the .vscode subfolder from the old folder into the new folder).
Starting to Debug Code
Open a piece of code with VS Code, hover over the blank area to the left of the line numbers, and click the red dot that appears to set a breakpoint for that line. Click it again to cancel the breakpoint.

Press F5 to enter debugging mode. A debugging toolbar will appear at the top of the editor. From left to right, the four blue buttons represent continue, next, step, and until in GDB:

If the editor does not jump automatically, click the “Run and Debug” icon in the left toolbar to enter the debugging window, where you can see the values of variables on the left.
In “Watch”, you can enter an expression. It will be reevaluated and displayed every time you perform an operation such as next or step.
In “Call Stack”, you can see the stack frames of the currently executing function.
Tip
You can refer to the official GDB documentation to view the contents of an interval of an array.
In debugging mode, the editor displays the code that will be executed next with a yellow background.
Configuring IntelliSense
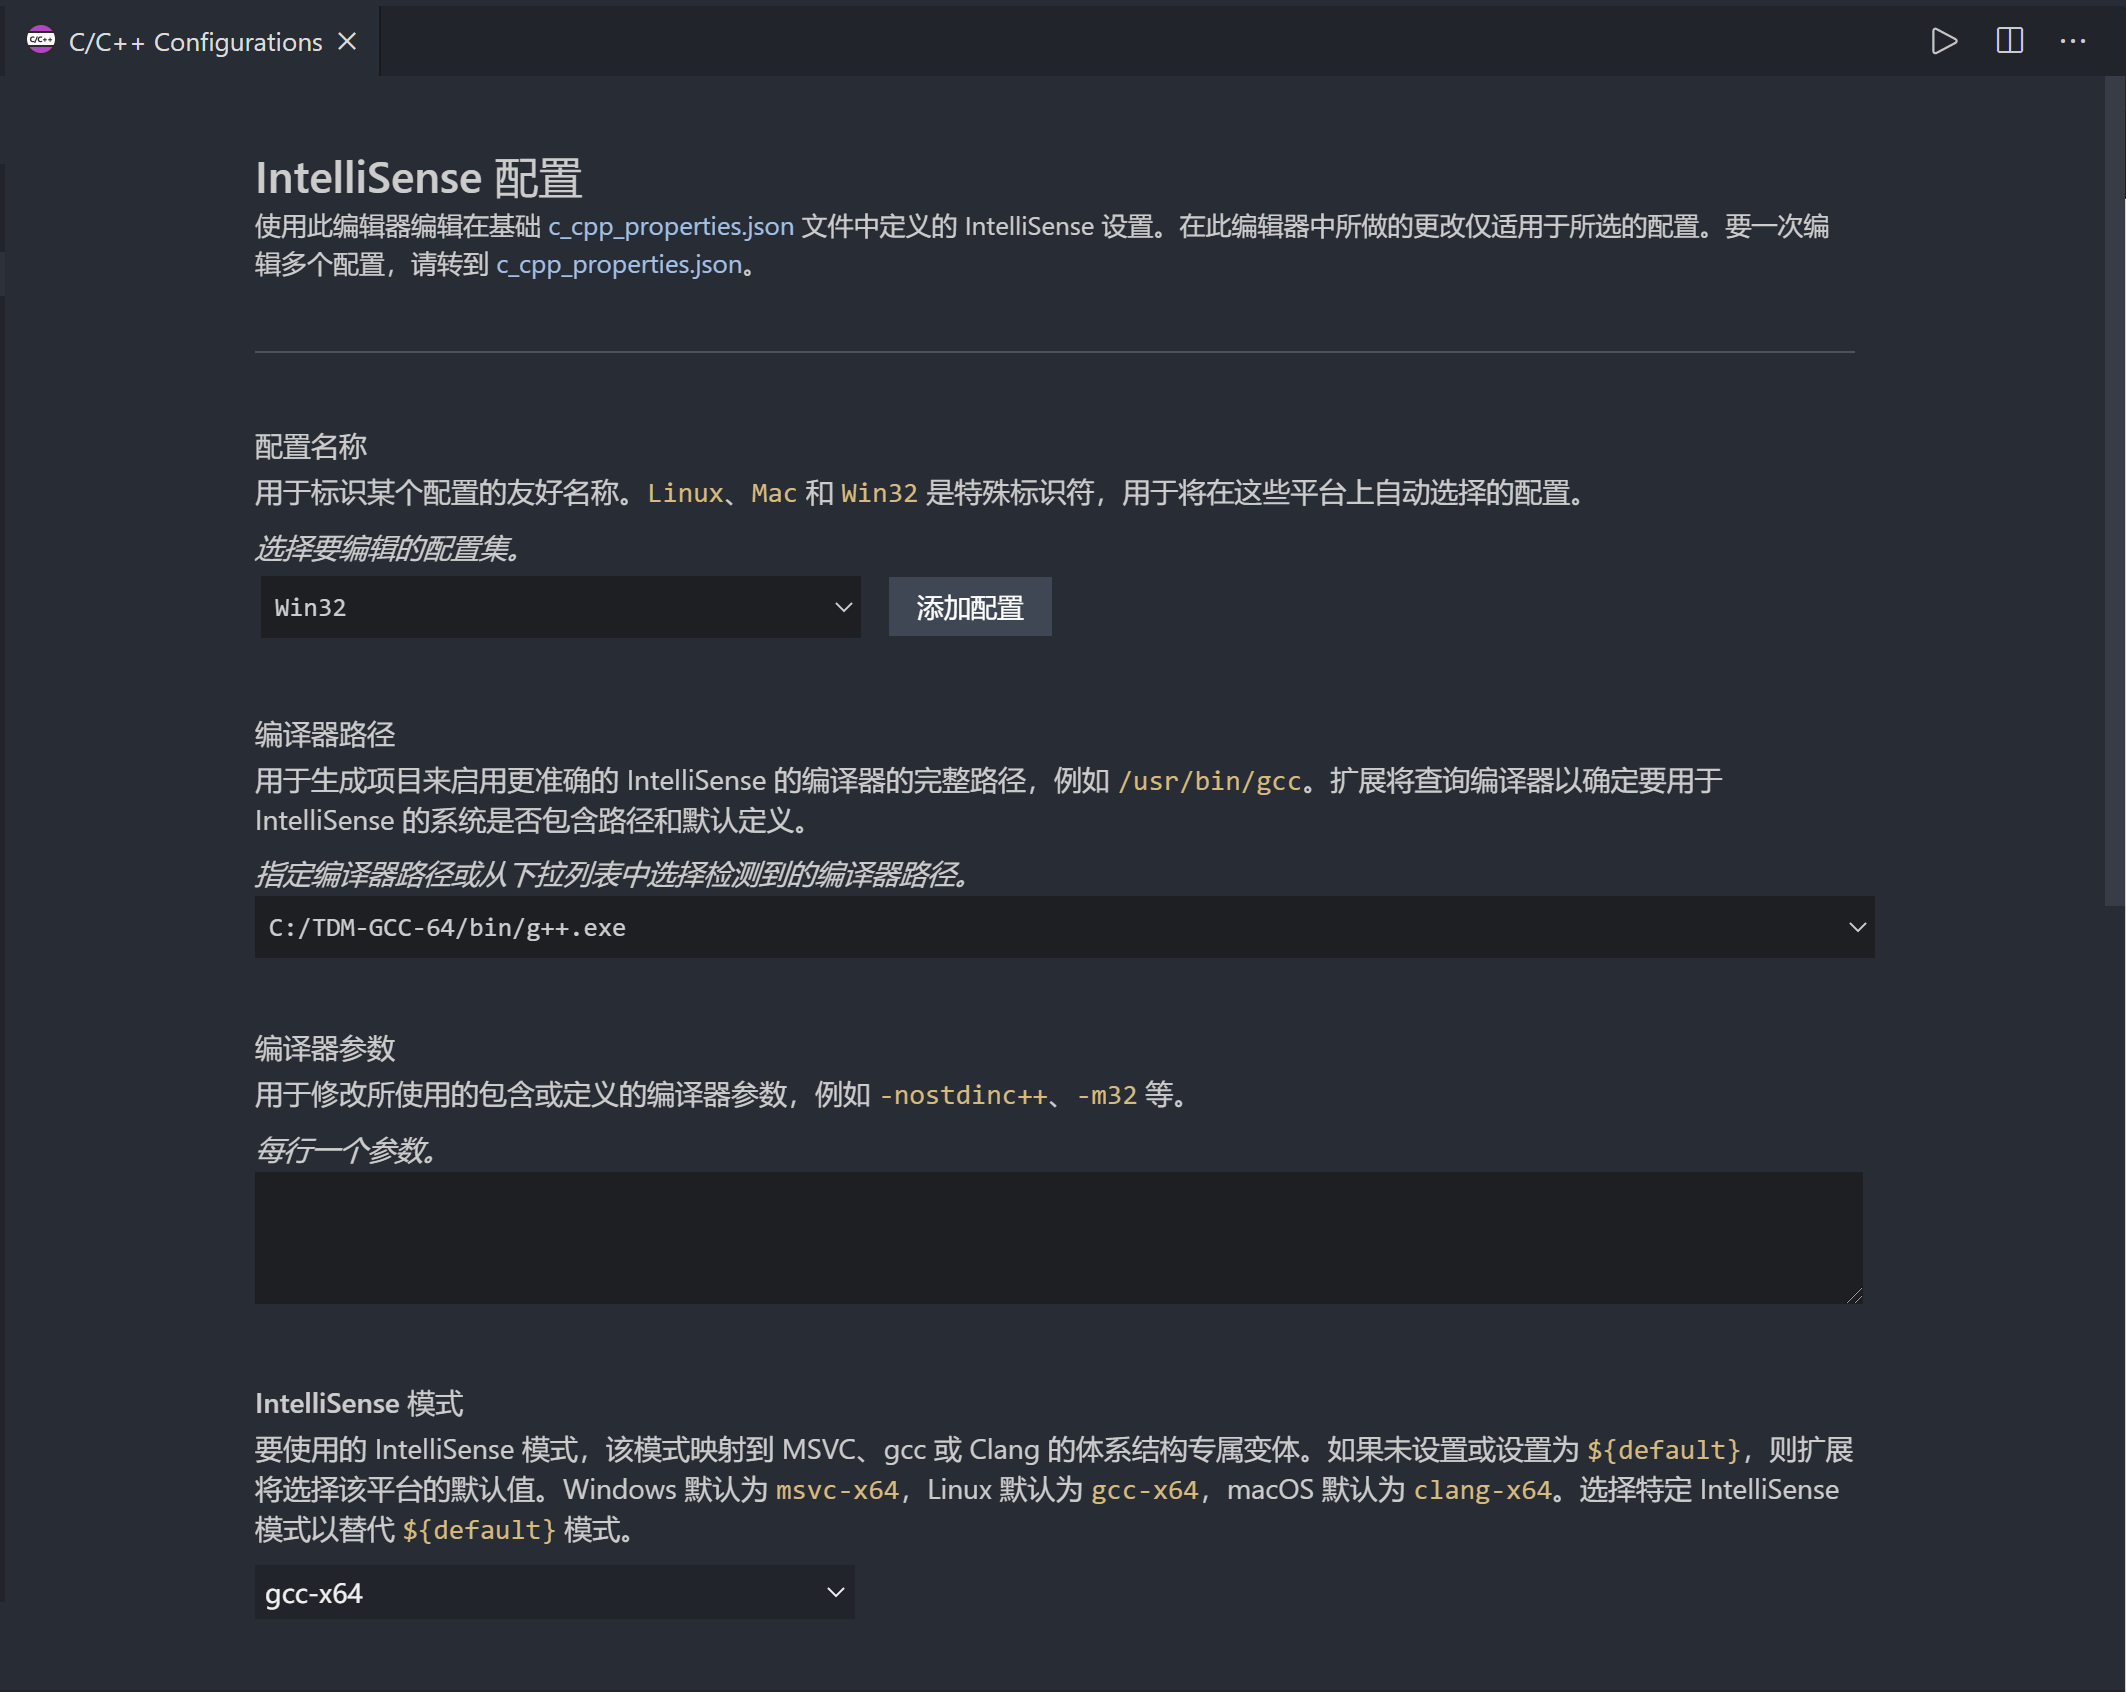
Used to adjust VS Code's IntelliSense.
If you use the Clang compiler, select clang-x64 rather than the default msvc-x64 under “IntelliSense Mode”; if you use the G++ compiler, select gcc-x64 to use features such as autocompletion. Otherwise, you will get the error “IntelliSense mode msvc-x64 is incompatible with the compiler path.”
Configuring clangd
Warning
Due to feature conflicts, after installing the clangd extension, the IntelliSense feature of the C/C++ extension will be disabled (features such as debugging will still use the C/C++ extension). If there is a problem with the clangd extension, check whether the IntelliSense feature of the C/C++ extension has been disabled.
Introduction to clangd
The LLVM website introduces clangd as follows:
Clangd is an implementation of the Language Server Protocol leveraging Clang. Clangd’s goal is to provide language "smartness" features like code completion, find references, etc. for clients such as C/C++ Editors.
Simply put, clangd is Clang's implementation of the Language Server Protocol (LSP). It provides intelligent features such as whole-project indexing, code navigation, variable renaming, faster code completion, hints, and code formatting, and can use LSP to work with editors such as Vim, Emacs, and VSCode. Although the official definition is an implementation of LSP, clangd's functionality is closer to that of a language server than merely the protocol itself.
VS Code's C/C++ extension also provides features such as autocompletion, but compared with clangd it is somewhat inferior in the readability and accuracy of its hints. Therefore, we sometimes use clangd instead of the C/C++ extension to implement code autocompletion.
Installation
See Getting started.
VS Code Extension
Open the VS Code Extensions Marketplace, enter clangd in the search bar, find the clangd extension, and install it.
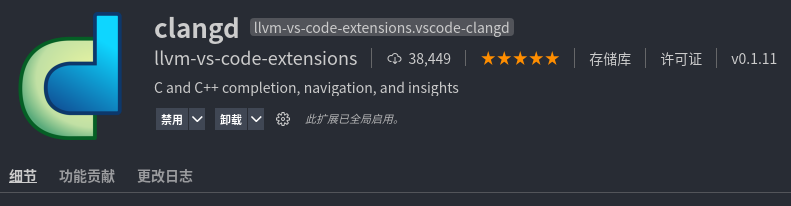
If a dialog appears below asking clangd to close Intellisense, click "Disable Intellisense" and reload the workspace to use clangd's autocompletion and other features.
Editing
Syntax Settings
Click “Select Language” in the newly opened editor to open the corresponding syntax highlighting, as shown in the figure:

Shortcuts
The official keyboard-shortcut PDFs are below. You can also press Ctrl+Shift+P in VS Code to open the Command Palette and enter the command > Help: Keyboard Shortcuts Reference to open them.3
Some shortcuts:
| Key | Action |
|---|---|
| Ctrl+C/X | Copy/cut the current line (when no content is selected) |
| Ctrl+Shift+K | Delete the current line |
| Alt+Up/Down | Move the line up/down |
| Alt+Shift+Up/Down | Duplicate the line upward/downward |
| Ctrl+/ | Toggle line comment |
| Ctrl+[/] | Indent the line left/right |
| Ctrl+Shift+[/] | Fold/unfold the line |
| Ctrl+P | Open a recently opened file |
| Alt+Z | Toggle automatic line wrapping |
| Alt+F12 | Peek definition (such as a function definition) |
| Ctrl+Shift+\ | Go to matching bracket |
| Ctrl+T | Find symbols in the workspace (find functions with specified names in a folder, etc.) |
Multiple Cursors
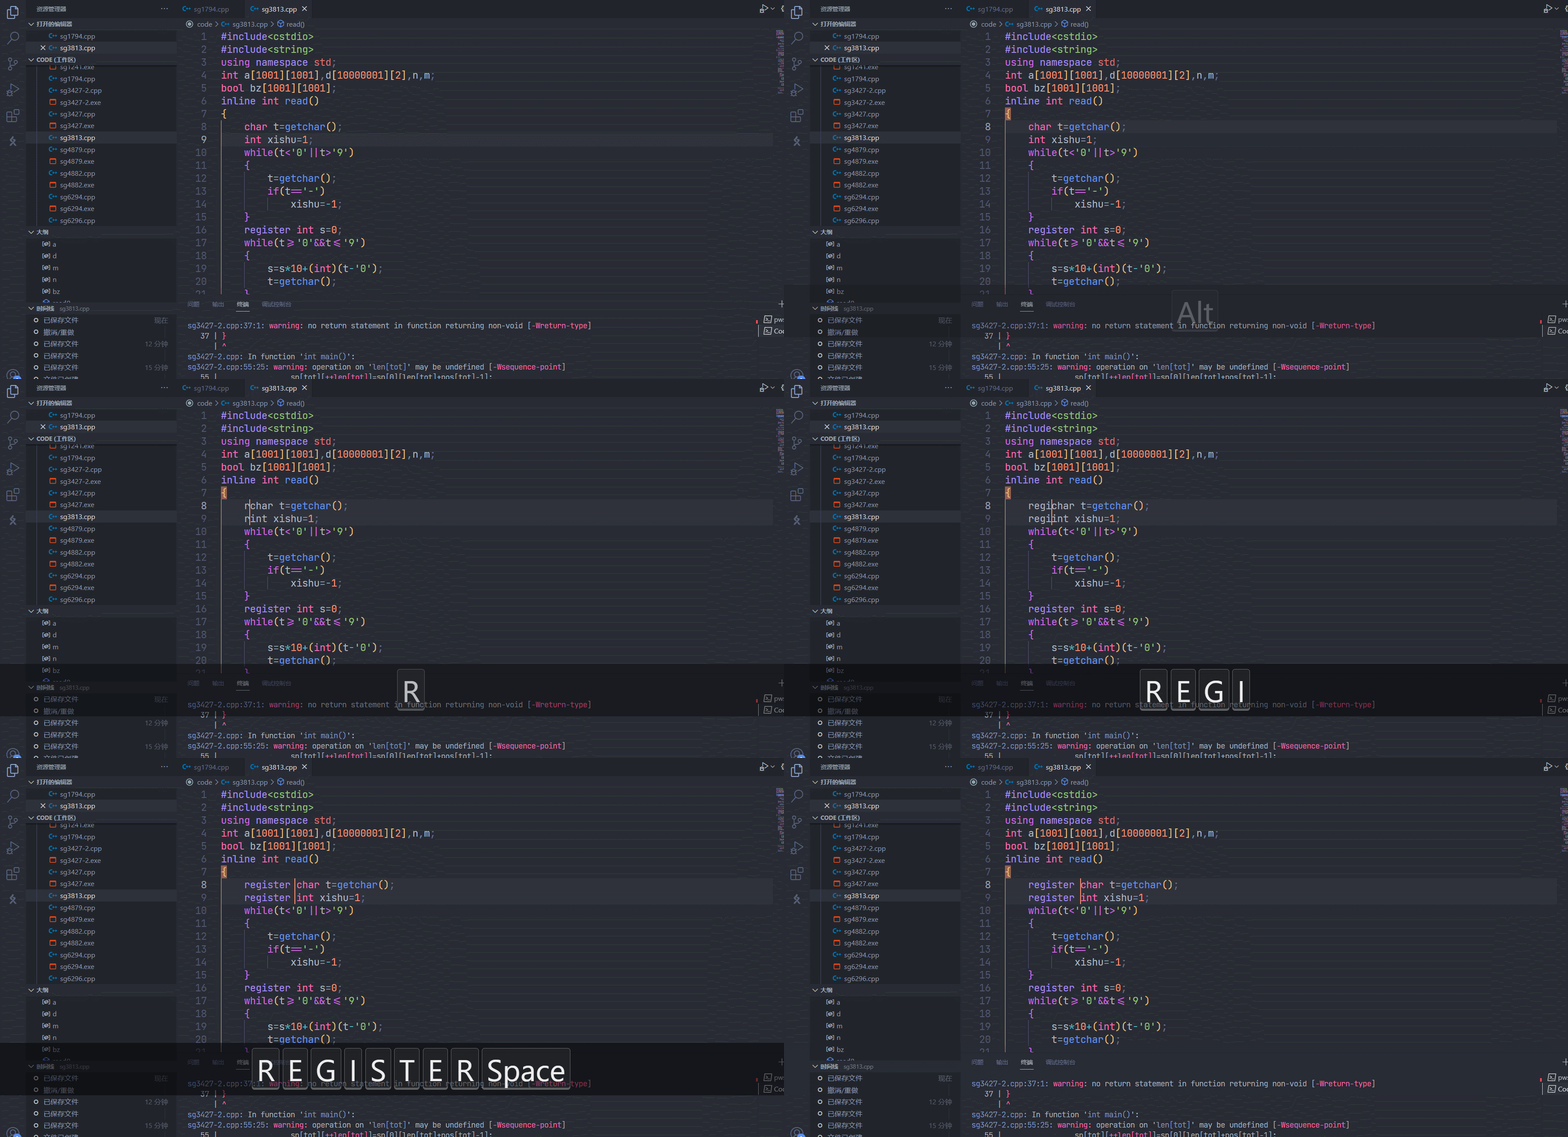
Hold Alt and click to add cursors in the editor; most editing operations can then be performed simultaneously. You can also hold the middle mouse button and drag in the editor to add multiple line cursors, as shown in the figure:
Press Ctrl+F2 to change all matching occurrences simultaneously in the editor. You can also find Change All Occurrences in the context menu, as shown in the figure:
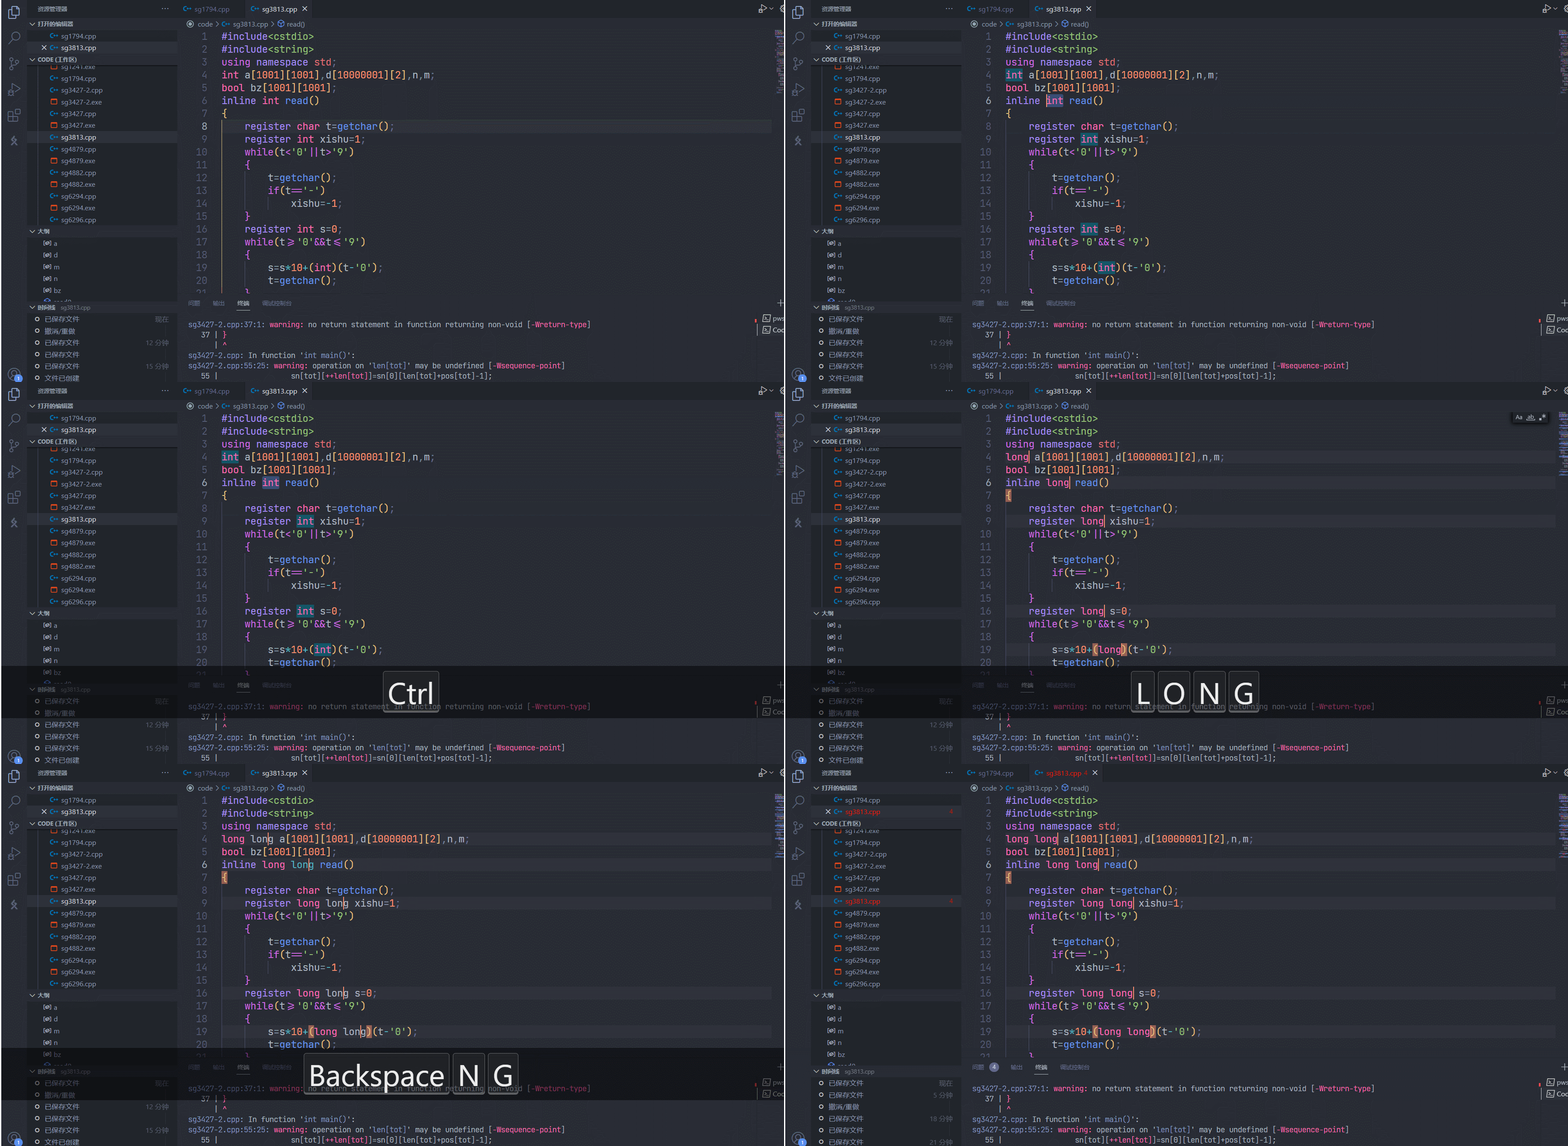
Note that there is a toolbar in the upper-right corner at this time, where you can enable or disable case-sensitive matching, whole-word matching, and so on when finding matches.
References and notes
Footnotes
-
If the C/C++ extension in VS Code selects lldb as the debugger, it uses the lldb-mi program by default. This program has been separated from the project by the LLVM development team and must be compiled manually. It also has some bugs, and its user experience and convenience are inferior to those of the CodeLLDB extension. ↩
-
After CodeLLDB is installed from the Extensions Marketplace, it downloads the main component from GitHub again. The download speed is extremely slow and sometimes the download fails, so it is best to download the main component directly and then install it. Updates can also be downloaded and installed directly according to the steps above. ↩