Introduction
Code::Blocks is an open-source integrated development environment (IDE) developed using C++, with wxWidgets as its GUI library. The project began in 2001 and is currently maintained by the official community. It is mainly used for developing programs in languages such as C, C++, and Fortran.1
Advantages:
-
Lightweight and efficient: Code::Blocks consumes few resources and starts quickly. It is suitable for resource-constrained environments and developers who prefer lightweight IDEs, as well as for beginner developers to learn and use.
-
Cross-platform compatibility: It supports multiple operating systems, including Windows, Linux, and macOS, and provides a consistent user experience, allowing developers to work seamlessly across different platforms.
-
Broad compiler support: It supports multiple compilers, including GCC, MSVC (Microsoft Visual C++), Digital Mars, and Borland C++ 5.5, allowing developers to choose the most suitable compilation tool according to project requirements.
Disadvantages:
-
Limited feature set: Compared with IDEs such as CLion or Eclipse, its built-in features and tools are relatively basic and may be insufficient for complex projects.
-
Weak plugin ecosystem: Although it supports plugin extensions, the number and quality of third-party plugins are limited, so its plugin ecosystem is relatively weak.
Installation
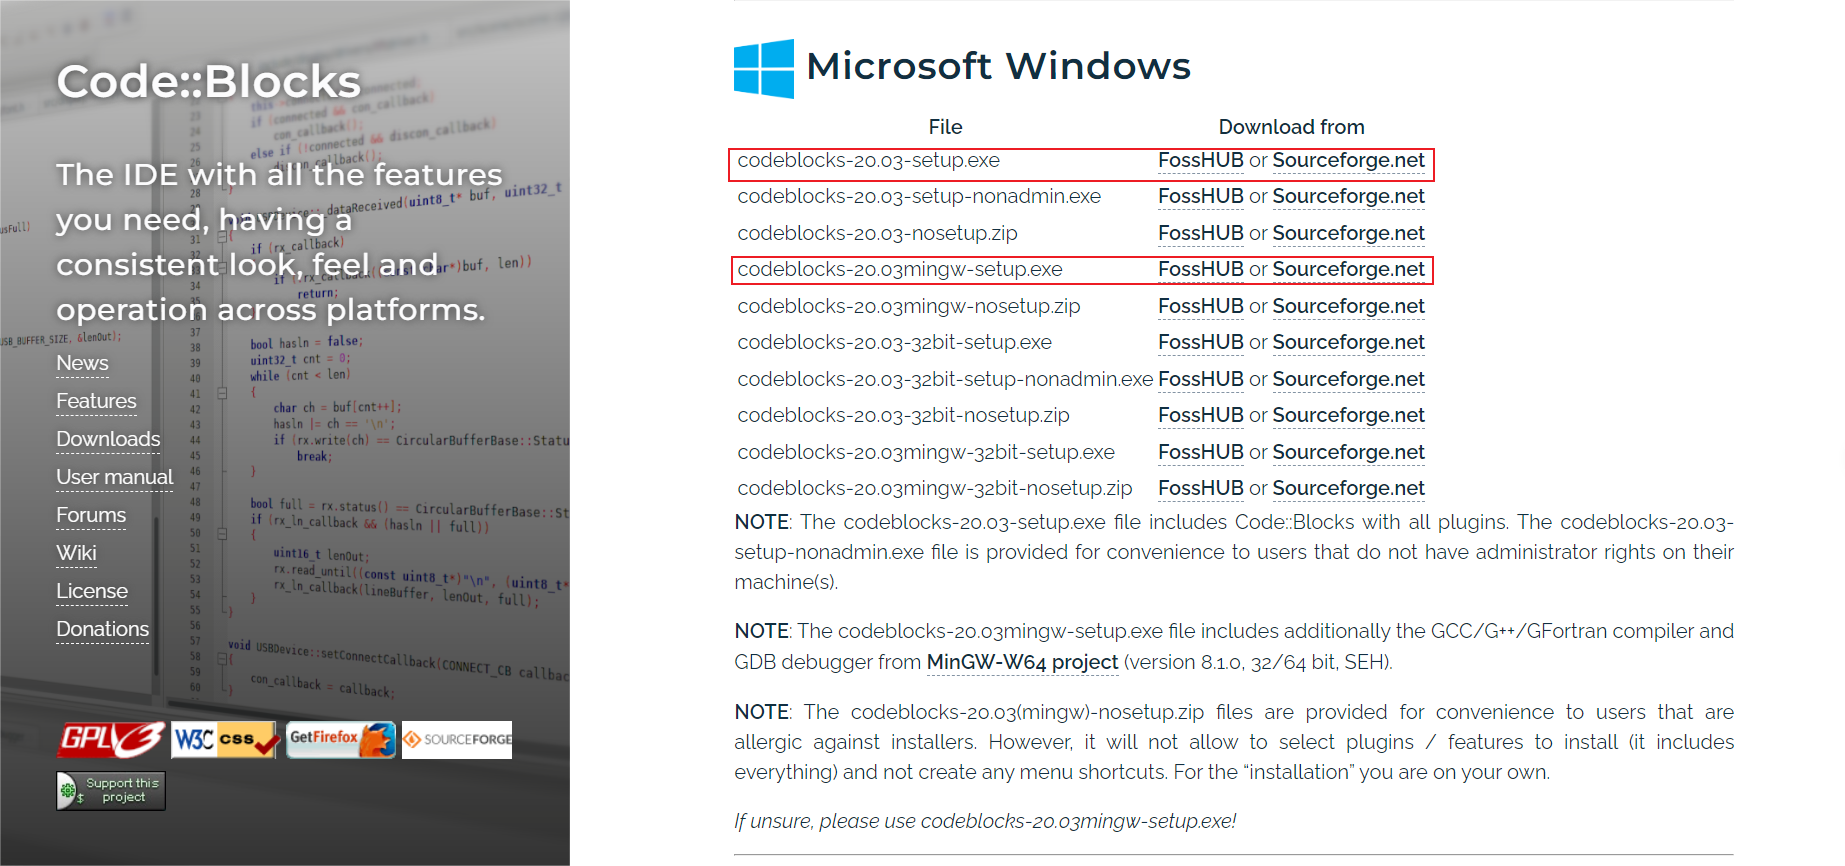
See the Code::Blocks official website. Choose to download the binary installer (Binary Release), or download the source code and compile it for installation (Source Code). Then choose the appropriate installer according to your needs and operating system, and complete the installation by following the installation wizard.
Download an installer containing MinGW
For Windows users who do not want to configure a compiler manually, downloading an installer containing MinGW is recommended, such as codeblocks-xxxxmingw-setup.exe. This version already includes the GCC compiler, so you can begin developing C and C++ projects without additional installation or configuration.
Configuration
If you chose an installer that does not include MinGW during installation, or if you need to use another compiler, you need to install and configure the compiler manually, and then configure Code::Blocks to use it.
Toolchain Installation
Refer to the site's compiler installation guide to download and install the compiler you need.
Toolchain Setup
When Code::Blocks is started for the first time, the software automatically scans the compilers installed on the system. If no compiler is found, you can add one manually by following these steps:
- Open Code::Blocks and click
Settings -> Compilerin the menu bar to open the compiler settings dialog (as shown in the figure).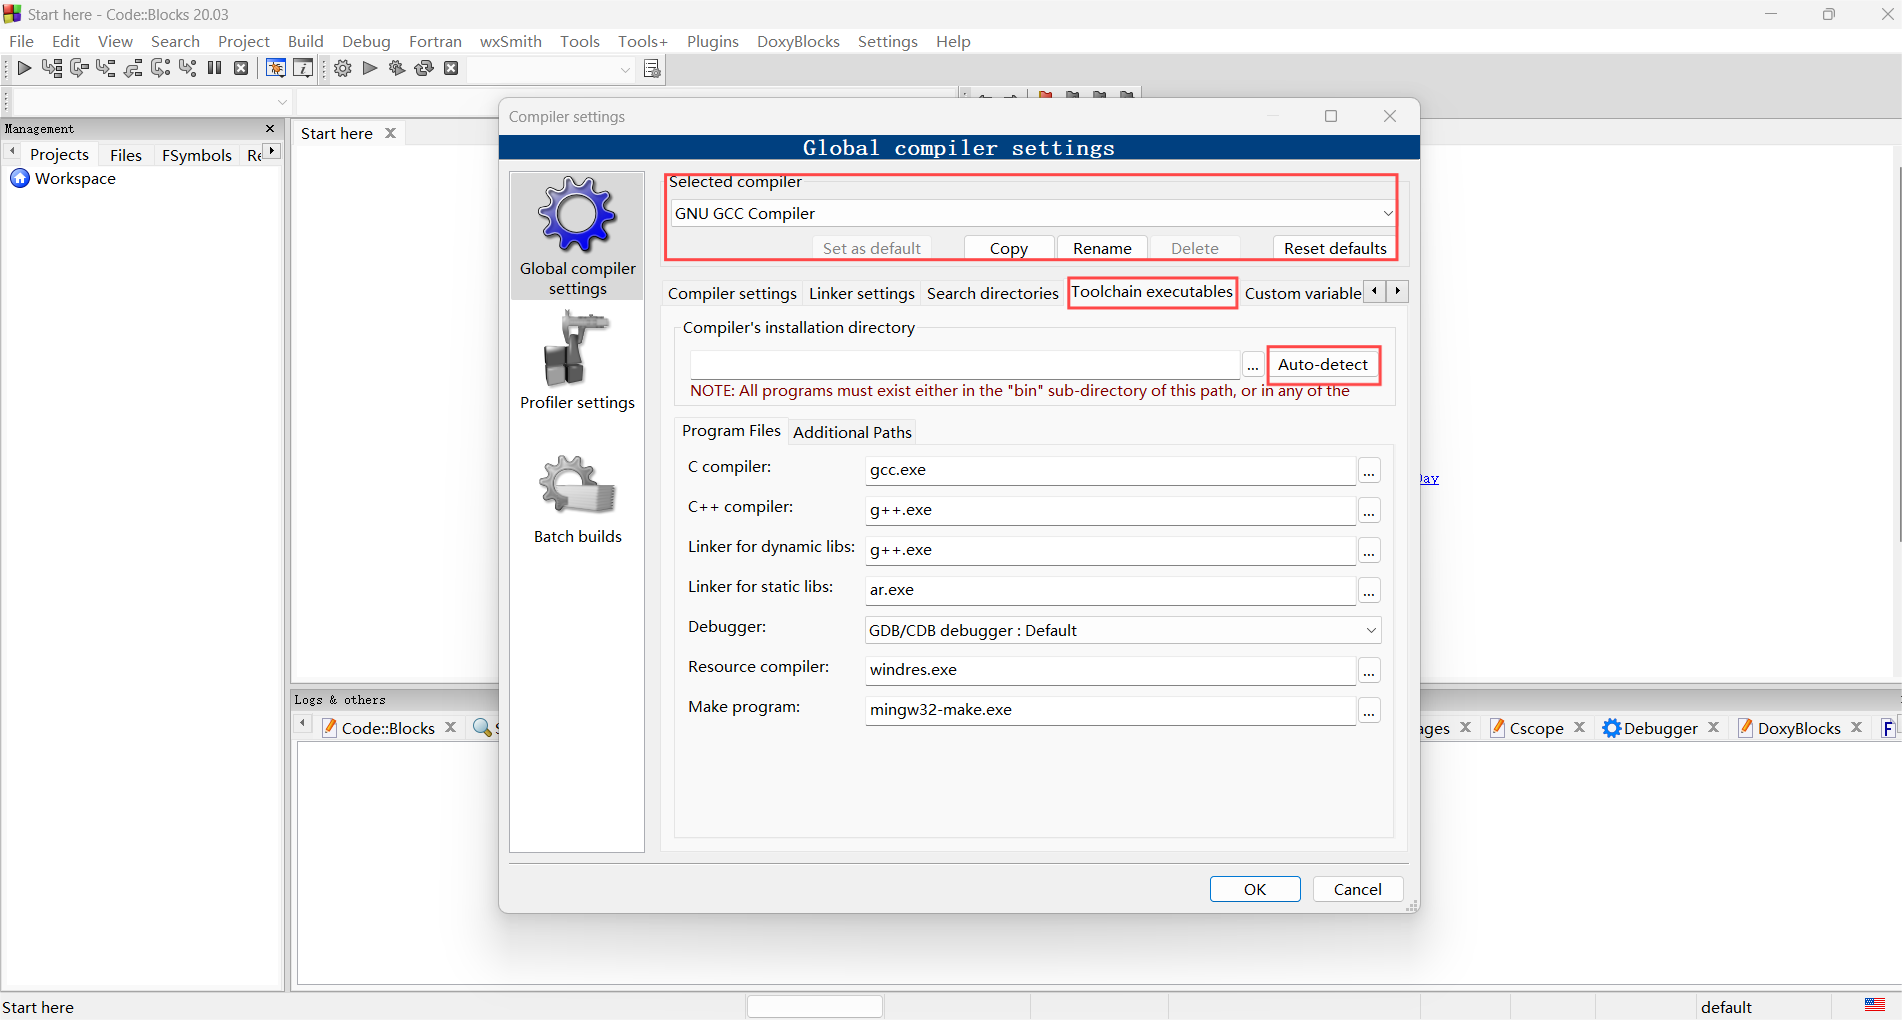
CodeBlocks Compiler Settings - Select the compiler to configure in the
Selected compilerdrop-down list, such asGNU GCC Compiler. - In the
Toolchain executablestab, click theAuto-detectbutton. Code::Blocks will automatically scan the compilers installed on the system. - If automatic scanning fails, you can set the compiler path manually. Enter the compiler's installation path in
Compiler's installation directory, such asC:\MinGW\bin. - After setup is complete, click
OKto save the settings. You can now use the configured compiler to compile and run projects.
Usage
Code::Blocks has a built-in project manager and supports user-defined project builds. You can set compilation options, choose compilers, compilation options, linker options, and so on in Project -> Build options. You can also set project properties, such as the project name, path, and file list, in Project -> Properties.
Configuring a Makefile
Code::Blocks does not require a Makefile by default. If you need to use a custom Makefile, check the This is a custom Makefile option in Project -> Properties, and then set the Makefile path in Project -> Build options.
Creating a Project
The programming languages supported by Code::Blocks include C, C++, and Fortran. After starting Code::Blocks, you can create a new project through File -> New -> Project, choose the project type and template, then set the project name, path, compiler, and so on according to the wizard's instructions, and finally click Finish to complete project creation.
Code::Blocks also supports compiling and running a single file. You can create a new file through File -> New -> File, write and save the code, and then click the Build and run button on the toolbar or press F9 to automatically compile and run the current file.
Building and Running
Using a simple Console Application project as an example, the following introduces how to build and run a project:
- After the project is created, you will see a default
main.cppfile. You can write code in the file and then save it. - After writing the code, click the
Build and runbutton on the toolbar or pressF9. Code::Blocks will automatically compile and run the project. - After compilation and execution, the output window will display the program's output. You can inspect the output in the output window and adjust the code as needed.
- If you only need to compile the project without running it, click the
Buildbutton or pressCtrl + F9. Code::Blocks will only compile the project and will not run it.
Debugging
Code::Blocks has a built-in debugger. You can configure and start the debugger from the Debug menu to help locate and fix errors in your program.
Similarly, using a simple Console Application project as an example, the following introduces how to debug a project:
- Set a breakpoint: Click the left side of the code line to be debugged with the left mouse button to set a breakpoint. The program will stop at the breakpoint.
- Start the debugger: Click the
Debugbutton on the toolbar or pressF8. Code::Blocks will automatically compile and start the debugger. - Debug the program: In the debugger, you can execute the program step by step and inspect variable values, the call stack, and so on to help locate and fix errors.
- Stop debugging: After debugging is complete, click the
Stopbutton or pressShift + F8to stop the debugger.
Custom Settings
Code::Blocks provides extensive settings that can help adjust the editor's behavior. The following are some common settings:
Interface Settings
- In
Settings -> Editor, you can set the editor's font, colors, indentation, autocompletion, and other options. - In
Settings -> Environment, you can set Code::Blocks' global behavior, such as automatic saving, automatic backups, and automatic notifications. - In the
Viewmenu, you can adjust the editor's layout, such as showing or hiding the file browser, toolbar, status bar, output window, and so on.
Plugin Settings
Code::Blocks supports plugins for extending its functionality. You can view and install available plugins through Settings -> Plugins, such as DoxyBlocks and wxSmith. The following are some commonly used plugins:
- DoxyBlocks: An integration plugin for the well-known documentation-generation tool Doxygen, which can directly generate project documentation in Code::Blocks.
- wxSmith: A plugin for developing wxWidgets applications. It provides visual interface-design tools for quickly creating and laying out GUIs, simplifying the development process.
- Thread Search: A plugin supporting multithreaded search that can quickly search and replace symbols and text in a project, suitable for developing large projects.
For plugin installation and usage, refer to the Code::Blocks plugin documentation. Choose and install plugins according to their requirements and functionality.
Note
Code::Blocks' plugins are relatively limited and basic, and most plugins have already been integrated into the software. The number and quality of third-party plugins are limited, so choosing plugins according to actual needs is recommended.
Shortcut Settings
You can view and modify shortcuts in the Settings -> Editor -> Keyboard shortcuts tab, adjusting them according to your habits.
The following are some common shortcuts:
| Function | Shortcut |
|---|---|
| Create a new file | Ctrl + Shift + N |
| Open a file | Ctrl + O |
| Save the current file | Ctrl + S |
| Save all | Ctrl + Shift + S |
| Close the current file | Ctrl + W |
| Close all files | Ctrl + Shift + W |
| Build and run the current project | F9 |
| Only build the current project | Ctrl + F9 |
| Only compile the current project | Ctrl + Shift + F9 |
| Run the current project | Ctrl + F10 |
| Debug: start/continue | F8 |
| Debug: stop | Shift + F8 |
| Debug: step over | F7 |
| Debug: step into | Shift + F7 |
| Debug: step out | Ctrl + F7 |
| Debug: toggle breakpoint | F5 |
| Find | Ctrl + F |
| Find and replace | Ctrl + R |
| Go to line | Ctrl + G |
| Go to matching bracket | Ctrl + B |
| Toggle fullscreen | F11 |
| Toggle all folds | Ctrl + Shift + - |
| Expand all folds | Ctrl + Shift + + |
| Select next match | Ctrl + E |
| Select and jump to next match | Ctrl + Shift + E |